How to Change Keurig Filter? Good Tips and Guides in 2024
HOW TO CHANGE KEURIG FILTER? GOOD TIPS AND GUIDES IN 2024.
In the fast-paced world we live in, a great cup of coffee can be a small but essential pleasure. And when it comes to convenience and speed, Keurig coffee makers have become a go-to choice for many coffee enthusiasts. These sleek and efficient machines allow us to enjoy a freshly brewed cup of coffee in a matter of minutes, thanks to their innovative pod-based brewing system.
However, to ensure that your Keurig machine continues to deliver the best possible coffee flavor and maintain its optimal performance, it’s important to pay attention to the maintenance of its components. One vital element of this maintenance routine is changing the Keurig filter.
The filter plays a crucial role in purifying the water used for brewing, ensuring that your coffee tastes clean and flavorful with every sip.
In this step-by-step guide, we will walk you through the process of changing the filter in your Keurig coffee maker. Whether you’re a seasoned Keurig user or a newbie exploring the world of single-serve coffee, this article will provide you with the knowledge and confidence to effortlessly replace your Keurig filter and elevate your brewing experience.
So, let’s dive in and learn how to change the filter in your Keurig machine, allowing you to savor each cup of coffee with the utmost satisfaction!

HOW TO CHANGE KEURIG FILTER?
1. WHAT IS KEURIG FILTER?
The Keurig filter, also known as the water filter cartridge or the Keurig water filter, is an essential component of Keurig coffee makers. It is designed to purify the water used for brewing, ensuring that impurities and unwanted flavors are removed, resulting in a cleaner and more enjoyable cup of coffee.
The filter cartridge is typically a small, charcoal-based filter that fits inside the water reservoir of your Keurig machine. Its primary function is to reduce chlorine, sediment, and other impurities that may be present in your tap water, which can affect the taste and quality of your brewed coffee.
By removing these contaminants, the Keurig filter helps to enhance the flavor profile of your coffee, providing a smoother and more satisfying beverage.
Keurig recommends changing the filter every two months or after brewing approximately 60 reservoirs’ worth of coffee, depending on your usage. Regularly replacing the filter ensures optimal performance and helps to maintain the longevity of your Keurig coffee maker.
In the following sections, we will guide you through the simple steps involved in changing the Keurig filter, allowing you to continue enjoying the best possible coffee experience with your Keurig machine.
You can see How to Change Keurig Filter as below.
2. HOW MANY TYPES OF KEURIG FILTER?
Keurig offers a few different types of filters to accommodate various models and specific needs. Here are the main types of Keurig filters:
- Keurig Charcoal Water Filter Cartridges: These are the standard filters used in most Keurig machines. They are designed to remove impurities, such as chlorine, from your tap water, ensuring a cleaner taste in your brewed coffee. These filters usually come in a pack and need to be replaced every two months or after 60 reservoir refills.
- Keurig 2.0 Water Filter Starter Kit: This kit is specifically designed for Keurig 2.0 coffee makers. It includes a water filter handle and multiple water filter cartridges. The handle is reusable, and the cartridges are similar to the standard charcoal filters mentioned above.
- Keurig Side Reservoir Water Filter: This type of filter is designed for Keurig machines with a side water reservoir. It attaches directly to the water reservoir and provides the same filtration benefits as the charcoal filters.
It’s important to note that the availability of specific filter types may vary depending on the Keurig model and region. Always refer to the manufacturer’s instructions or consult the Keurig website to ensure you have the correct filter for your particular machine.
Regardless of the specific type, the purpose of all Keurig filters is to enhance the quality of your coffee by improving the taste and removing impurities from the water used in the brewing process.
You can refer How to Change Keurig Filter as below.
3. WHAT ARE BENEFITS OF KEURIG FILTER?
The Keurig filter offers several benefits that can enhance your brewing experience and the quality of your coffee. Here are some key benefits of using a Keurig filter:
- Improved Taste: The primary function of the Keurig filter is to remove impurities from the water used for brewing. By reducing chlorine, sediment, and other contaminants, the filter helps to enhance the taste of your coffee. It ensures that your brew is cleaner, smoother, and free from any unwanted flavors or odors that might be present in your tap water.
- Consistency: Using a Keurig filter promotes consistency in your coffee brewing. By removing impurities and standardizing the quality of the water, the filter helps to maintain a consistent flavor profile in every cup you brew. This ensures that you can enjoy your preferred taste consistently, whether you’re brewing a single cup or multiple cups throughout the day.
- Prolongs Machine Life: The Keurig filter also plays a role in maintaining the longevity of your coffee maker. By preventing mineral buildup and sediment from reaching internal components, the filter helps to keep your machine clean and functioning optimally. This can reduce the risk of clogs or damage to the brewer, potentially extending its lifespan and reducing the need for repairs or replacements.
- Convenience: Changing the Keurig filter is a simple and straightforward process, typically requiring only a few minutes of your time. This convenience allows you to easily maintain the performance of your coffee maker and ensure that each cup you brew is of the highest quality.
- Cost Savings: Using a Keurig filter can save you money in the long run. By filtering your tap water and reducing impurities, you may find that you can enjoy your coffee without the need for expensive bottled water or additional filtration systems. Additionally, maintaining your Keurig machine’s performance through regular filter changes can help prevent potential issues that could lead to costly repairs or the need for a new machine.
Overall, the Keurig filter offers the benefit of improving the taste and quality of your coffee, providing consistency, extending the life of your machine, offering convenience, and potentially saving you money. By incorporating regular filter changes into your coffee brewing routine, you can ensure a consistently delightful and satisfying coffee experience with your Keurig machine.
Please see How to Change Keurig Filter as below.
4. HOW TO USE KEURIG?
Using a Keurig coffee maker is a straightforward process that involves a few simple steps. Here’s a general guide on how to use a Keurig machine:
- Prepare the Machine:
- Ensure that the Keurig machine is plugged in and the power is turned on.
- Lift the handle or lid of the machine to access the brewing chamber.
- If there is an empty pod inside from a previous use, remove it and discard.
- Add Water:
- Open the water reservoir located at the back or side of the Keurig machine.
- Fill the reservoir with clean, cold water. Be mindful not to overfill it past the maximum fill line indicated.
- Preheat the Machine (optional):
- Some Keurig models have a preheating option. If available, press the preheat button and wait until the water is heated to the desired temperature. This step is optional and can help ensure a hotter cup of coffee.
- Insert a K-Cup:
- Select your preferred K-Cup coffee pod. Keurig offers a wide variety of flavors and coffee brands to choose from.
- Lift the handle or lid of the Keurig machine to access the brewing chamber.
- Insert the K-Cup pod into the chamber, ensuring it is properly positioned and puncture needles are aligned with the pod’s foil top.
- Start Brewing:
- Close the handle or lid of the machine to secure the K-Cup pod in place.
- Select the desired cup size on the Keurig control panel. Most machines offer options for small, medium, and large cup sizes.
- Press the brew button to start the brewing process.
- Enjoy Your Coffee:
- Once the brewing is complete, the Keurig machine will dispense hot coffee into your cup.
- Carefully remove the cup from the drip tray and enjoy your freshly brewed coffee.
- Clean and Maintain:
- After brewing, remove the used K-Cup pod from the chamber and discard it.
- Regularly clean the exterior and internal components of your Keurig machine as per the manufacturer’s instructions.
- Replace the Keurig filter every two months or as recommended by the manufacturer.
It’s important to note that the specific steps may vary slightly depending on the model of your Keurig machine. Always refer to the user manual that comes with your particular Keurig coffee maker for detailed instructions and any unique features specific to your model.
Please refer How to Change Keurig Filter as below.
5. HOW TO CLEAN KEURIG?
Cleaning your Keurig coffee maker is essential to maintain its performance and ensure a great-tasting cup of coffee. Here’s a step-by-step guide on how to clean a Keurig:
Regular Cleaning (Weekly/Bi-Weekly):
- Unplug and Disassemble:
- Ensure that the Keurig machine is unplugged from the power source.
- Remove any remaining K-Cup pod from the brewing chamber.
- Take out the removable parts, such as the drip tray, drip tray cover, and water reservoir.
- Wash Removable Parts:
- Wash the removable parts with warm, soapy water. This includes the drip tray, drip tray cover, and water reservoir.
- Rinse thoroughly to remove any soap residue.
- Allow the parts to air dry or dry them with a clean cloth.
- Clean the Exterior:
- Wipe the exterior of the machine using a damp cloth. Pay attention to areas that may have accumulated dust or spills.
- For stubborn stains, use a mild cleaning solution or vinegar-water mixture (1 part vinegar to 2 parts water).
- Avoid getting the control panel or other electronic components wet.
- Clean the Water Reservoir:
- Empty any remaining water from the water reservoir.
- Wipe the inside of the reservoir with a damp cloth to remove any residue or buildup.
- Clean the Brewer:
- Use a damp cloth to wipe the exterior of the brewing chamber and the area around the puncture needles.
- Gently insert a clean, damp cloth into the brewing chamber and wipe the inside to remove any coffee grounds or residue.
- Be cautious not to puncture the cloth on the sharp needles.
- Reassemble and Rinse:
- Reassemble the cleaned parts, including the drip tray, drip tray cover, and water reservoir.
- Fill the water reservoir with clean, cold water.
- Run a brewing cycle without a K-Cup pod to rinse the brewing system and remove any remaining residue.
Deep Cleaning (Monthly):
In addition to regular cleaning, it is recommended to perform a deep cleaning of your Keurig machine once a month. This helps to remove mineral deposits and improve performance.
- Descaling:
- Purchase a Keurig descaling solution or use a mixture of equal parts water and white vinegar.
- Fill the water reservoir with the descaling solution or vinegar-water mixture.
- Place a large mug or container on the drip tray to collect the liquid.
- Run Descaling Cycle:
- Start a brewing cycle without a K-Cup pod.
- Allow the machine to run the descaling solution through the brewer and into the mug/container.
- Repeat the cycle as necessary, following the instructions provided with the descaling solution or vinegar-water mixture.
- Rinse:
- After completing the descaling cycle, empty the mug/container.
- Fill the water reservoir with clean, cold water.
- Run multiple brewing cycles without a K-Cup pod to rinse the brewer and remove any residual descaling solution or vinegar.
By following these cleaning steps regularly, you can keep your Keurig coffee maker in optimal condition, ensuring a consistent and enjoyable coffee brewing experience. Always consult the specific instructions provided in your Keurig machine’s user manual or refer to Keurig’s official cleaning guidelines for detailed information based on your model.
There are How to Change Keurig Filter as below.
6. STEPS ON HOW TO CHANGE KEURIG FILTER?
Here are the steps to change the filter in your Keurig coffee maker:
- Prepare the Machine:
- Ensure that the Keurig machine is turned off and unplugged from the power source.
- Lift the handle or lid of the machine to access the water reservoir.
- Remove the Old Filter:
- Locate the filter holder inside the water reservoir. It is usually a small, circular or rectangular plastic piece.
- Gently grasp the old filter by the handle or tab and lift it out of the holder. Dispose of the used filter.
- Rinse the Filter Holder:
- While the filter is removed, take a moment to rinse the filter holder under running water to remove any debris or residue.
- Soak the New Filter:
- Submerge the new Keurig filter cartridge in a bowl of clean water. Allow it to soak for a few minutes. This step helps to activate the charcoal inside the filter.
- Install the New Filter:
- Take the soaked filter out of the water and shake off any excess water.
- Insert the new filter into the filter holder, ensuring it is fully seated and positioned correctly.
- If applicable, follow any specific instructions provided with the filter or your Keurig model.
- Reassemble and Prepare for Use:
- Place the filter holder with the new filter back into the water reservoir.
- Ensure that it is properly aligned and fits securely in place.
- Refill the water reservoir with clean, cold water, making sure not to overfill it.
- Run Rinse Cycle:
- Close the handle or lid of the Keurig machine.
- Place an empty mug on the drip tray to collect the water.
- Turn on the machine and select a rinse cycle (or the smallest cup size).
- Press the brew button and allow the machine to run a full brewing cycle without a K-Cup pod. This rinses the system and removes any air or debris.
- Discard Initial Brew:
- After the rinse cycle is complete, discard the brewed water in the mug.
- Ready to Brew:
- Your Keurig machine is now ready to brew fresh cups of coffee with the new filter in place.
- Follow the regular brewing instructions provided by the manufacturer.
Remember to replace the Keurig filter every two months or as recommended by the manufacturer. Regularly changing the filter ensures optimal performance and helps maintain the quality of your brewed coffee.
Please note that the steps may vary slightly depending on the specific model of your Keurig machine. It’s always best to consult the user manual or Keurig’s official guidelines for your particular model to ensure accurate instructions.
We introduce How to Change Keurig Filter as above. Now, let’s see some tips and guides on How to Change Keurig Filter as below.
TIPS AND GUIDES ON HOW TO CHANGE KEURIG FILTER.

1. SOME TIPS ON HOW TO CHANGE KEURIG FILTER.
Here are some helpful tips to keep in mind when changing the filter in your Keurig coffee maker:
- Use Genuine Keurig Filters: It is recommended to use genuine Keurig filters that are specifically designed for your machine. This ensures compatibility and optimal performance. Genuine filters are widely available online and in stores that sell Keurig products.
- Read the User Manual: Consult the user manual that came with your Keurig machine. It will provide specific instructions and any unique considerations for changing the filter in your particular model.
- Soak the New Filter: Before installing the new filter, soak it in a bowl of clean water for a few minutes. This helps to activate the charcoal inside the filter, ensuring maximum effectiveness in removing impurities from the water.
- Rinse the Filter Holder: Take a moment to rinse the filter holder with water before installing the new filter. This helps to remove any debris or residue that may have accumulated.
- Properly Align the Filter: When installing the new filter, ensure it is fully seated and properly aligned in the filter holder. It should fit securely and evenly without any gaps.
- Follow Brewing Instructions: After installing the new filter, run a rinse cycle without a K-Cup pod to flush out any air or debris from the system. Follow the brewing instructions provided by the manufacturer for your specific model.
- Maintain a Filter Replacement Schedule: To ensure consistent performance, establish a regular schedule for changing the filter. Keurig recommends replacing the filter every two months or after brewing approximately 60 reservoirs’ worth of coffee, but this may vary based on your usage and water quality.
- Consider Water Quality: If you live in an area with hard water or poor water quality, you may need to change the filter more frequently. Hard water can cause mineral buildup that affects the performance of your machine, so monitor the condition of the filter and adjust your replacement schedule accordingly.
- Keep the Machine Clean: In addition to changing the filter, regularly clean other parts of your Keurig machine, such as the water reservoir, drip tray, and brewing chamber, as mentioned in the previous cleaning instructions. A clean machine contributes to optimal brewing results.
By following these tips, you can ensure a smooth and effective process when changing the filter in your Keurig coffee maker. Enjoy your freshly brewed, filtered coffee!
We introduce How to Change Keurig Filter as above.
2. KEURIG CHARCOAL FILTER INSTRUCTIONS.
To help you with the specific instructions for the Keurig charcoal filter, here is a step-by-step guide:
- Soak the Charcoal Filter:
- Before using the charcoal filter for the first time, soak it in water for 5 minutes to activate the charcoal inside.
- Prepare the Machine:
- Ensure that your Keurig machine is turned off and unplugged from the power source.
- Lift the handle or lid of the machine to access the water reservoir.
- Remove the Filter Holder:
- Locate the filter holder inside the water reservoir. It is usually a small, circular or rectangular plastic piece.
- Gently grasp the filter holder and lift it out of the water reservoir.
- Insert the Charcoal Filter:
- Take the soaked charcoal filter and align it with the opening in the filter holder.
- Press the filter into the holder, ensuring it is fully seated and positioned correctly.
- Reattach the Filter Holder:
- Place the filter holder with the new charcoal filter back into the water reservoir.
- Ensure that it is properly aligned and fits securely in place.
- Reassemble and Prepare for Use:
- Refill the water reservoir with clean, cold water, making sure not to overfill it.
- Close the handle or lid of the Keurig machine.
- Run Rinse Cycle:
- Place an empty mug on the drip tray to collect the water.
- Turn on the machine and select a rinse cycle (or the smallest cup size).
- Press the brew button and allow the machine to run a full brewing cycle without a K-Cup pod. This rinses the system and removes any air or debris.
- Discard Initial Brew:
- After the rinse cycle is complete, discard the brewed water in the mug.
- Ready to Brew:
- Your Keurig machine is now ready to brew fresh cups of coffee with the charcoal filter in place.
- Follow the regular brewing instructions provided by the manufacturer.
Remember to replace the charcoal filter every two months or as recommended by Keurig. This ensures optimal performance and helps maintain the quality of your brewed coffee. Always consult the specific instructions provided by Keurig or refer to your machine’s user manual for accurate information based on your model.
You can see How to Change Keurig Filter as above.
3. HOW TO REPLACE KEURIG 2.0 WATER FILTER?
To replace the water filter in a Keurig 2.0 coffee maker, follow these step-by-step instructions:
- Purchase a Keurig 2.0 Water Filter Starter Kit:
- Obtain a Keurig 2.0 Water Filter Starter Kit, which includes a water filter handle and multiple water filter cartridges.
- Ensure that you have the correct kit designed specifically for Keurig 2.0 machines.
- Prepare the Machine:
- Make sure that your Keurig 2.0 coffee maker is turned off and unplugged.
- Lift the handle or lid of the machine to access the water reservoir.
- Remove the Old Filter (if applicable):
- If there is an existing filter in the filter handle, remove it by twisting it counterclockwise and pulling it out.
- Install the Water Filter Handle:
- Take the water filter handle from the Keurig 2.0 Water Filter Starter Kit.
- Insert the water filter handle into the water reservoir until it clicks into place.
- Soak the New Filter (if applicable):
- If the new water filter cartridges in your starter kit need to be soaked before use, follow the specific instructions provided in the kit.
- Some filters may require soaking in water for a few minutes to activate the charcoal inside.
- Insert the New Water Filter Cartridge:
- Take a new water filter cartridge from the starter kit, ensuring it is fully saturated (if required).
- Insert the new cartridge into the water filter handle, aligning the flat sides of the cartridge with the handle.
- Twist and Lock the Cartridge:
- Twist the cartridge clockwise until it is snugly fitted in the water filter handle.
- Ensure that the cartridge is securely locked in place.
- Reattach the Water Filter Handle:
- Place the water filter handle with the new cartridge back into the water reservoir.
- Ensure that it is properly aligned and fits securely in place.
- Reassemble and Prepare for Use:
- Refill the water reservoir with clean, cold water, making sure not to overfill it.
- Close the handle or lid of the Keurig 2.0 machine.
- Run Rinse Cycle:
- Place an empty mug on the drip tray to collect the water.
- Turn on the machine and select a rinse cycle (or the smallest cup size).
- Press the brew button and allow the machine to run a full brewing cycle without a K-Cup pod. This rinses the system and removes any air or debris.
- Discard Initial Brew:
- After the rinse cycle is complete, discard the brewed water in the mug.
- Ready to Brew:
- Your Keurig 2.0 coffee maker is now ready to brew fresh cups of coffee with the new water filter in place.
- Follow the regular brewing instructions provided by the manufacturer.
Please note that these instructions are specific to Keurig 2.0 coffee makers. Always refer to the instructions provided with the Water Filter Starter Kit or consult your machine’s user manual for accurate information based on your particular model.
You can refer How to Change Keurig Filter as above.
4. HOW TO REMOVE KEURIG WATER FILTER?
To remove the water filter from your Keurig coffee maker, follow these steps:
- Prepare the Machine:
- Ensure that your Keurig coffee maker is turned off and unplugged from the power source.
- Lift the handle or lid of the machine to access the water reservoir.
- Locate the Water Filter:
- Inside the water reservoir, you will find the water filter holder.
- The water filter is a small, plastic piece that is inserted into the holder.
- Remove the Water Filter Holder:
- Gently grasp the water filter holder by its handle or tab.
- Lift the water filter holder out of the water reservoir, exposing the water filter.
- Remove the Water Filter:
- Once the water filter holder is removed, you can easily slide out the water filter from the holder.
- Pull the water filter straight out of the holder.
- Discard or Clean the Water Filter:
- Depending on the type of water filter you have, it may be disposable or reusable.
- If the water filter is disposable, discard it and replace it with a new one.
- If the water filter is reusable, follow the manufacturer’s instructions for cleaning and maintenance.
- Reassemble and Prepare for Use:
- Once the water filter is removed, you can reinsert the empty water filter holder back into the water reservoir.
- Ensure that it is properly aligned and fits securely in place.
- Refill the Water Reservoir:
- Fill the water reservoir with clean, cold water as needed for your brewing needs.
- Be cautious not to overfill the reservoir beyond the maximum fill line indicated.
- Ready to Brew:
- Your Keurig coffee maker is now ready to brew without the water filter in place.
- Follow the regular brewing instructions provided by the manufacturer.
It’s important to note that removing the water filter will result in unfiltered water being used for brewing. If you prefer to have filtered water for better taste and quality, consider replacing the water filter with a new one according to the recommended schedule.
Always consult your machine’s user manual or refer to Keurig’s official guidelines for accurate information based on your specific model.
Please see How to Change Keurig Filter as above.
5. WHAT HAPPENS IF YOU DON’T CHANGE KEURIG FILTER?
If you don’t change the Keurig filter regularly, several issues may arise:
- Impurities and Off-Flavors: Over time, the filter becomes less effective at removing impurities, such as chlorine, sediment, and minerals, from the water used for brewing. This can result in off-flavors and unwanted tastes in your coffee. The presence of impurities can affect the overall quality of your brew, making it less enjoyable.
- Clogged Puncturing Needles: Without a clean and functioning filter, mineral deposits and sediment can accumulate in the brewing system, including the puncturing needles. This buildup can cause the needles to clog, affecting the flow of water and potentially leading to brewing issues like slow or uneven extraction.
- Decreased Performance: A clogged or inefficient filter can impact the performance of your Keurig machine. It may take longer for your coffee to brew, and the water flow may be inconsistent. The machine’s overall performance can suffer, resulting in a less satisfactory coffee experience.
- Potential Damage to the Machine: When impurities and mineral deposits build up in the brewing system, they can affect the internal components of your Keurig machine. This can lead to operational problems or even damage to the machine over time. Regularly changing the filter helps to prevent mineral buildup and protects the longevity of your coffee maker.
- Poor Water Quality Impact: If you use tap water with poor quality or high mineral content, not changing the filter can exacerbate the issues associated with such water. The taste and overall quality of your coffee may be negatively impacted, as the filter helps to remove unwanted substances and improve the water used for brewing.
By not changing the Keurig filter as recommended, you risk compromising the taste, quality, and performance of your coffee maker. Regularly replacing the filter ensures that your coffee is brewed with cleaner water, leading to a more enjoyable and satisfying cup of coffee.
Please refer How to Change Keurig Filter as above.
6. IS IT OK TO USE KEURIG WITHOUT FILTER?
Yes, it is okay to use a Keurig coffee maker without a filter. The filter in a Keurig machine is primarily responsible for removing impurities from the water used for brewing, improving the taste and quality of your coffee. However, if you don’t have a filter or choose not to use one, you can still brew coffee using tap water directly.
Using a Keurig without a filter means that you’ll be brewing with unfiltered water, which may contain impurities such as chlorine, minerals, or sediment. As a result, the taste and quality of your coffee may be affected. The presence of impurities in the water can lead to off-flavors or unwanted tastes in your brewed coffee.
If you decide to use your Keurig without a filter, you may want to consider using filtered or bottled water instead. This can help improve the taste of your coffee by reducing the amount of impurities present in the water. Additionally, regularly descaling your machine as per the manufacturer’s instructions can help remove mineral buildup and maintain optimal performance.
Ultimately, the decision to use a filter in your Keurig machine is a personal preference. If you prefer to have cleaner-tasting coffee, it is recommended to use a filter and replace it regularly according to the manufacturer’s guidelines.
There are How to Change Keurig Filter as above.
7. CAN I REUSE MY KEURIG FILTER?
Keurig filters are available in two types: disposable and reusable.
- Disposable Filters: These filters are not intended to be reused. They are designed to be replaced at regular intervals (typically every two months or after brewing a certain number of reservoirs’ worth of coffee) to maintain optimal performance. Disposable filters should be discarded and replaced with a new one when needed.
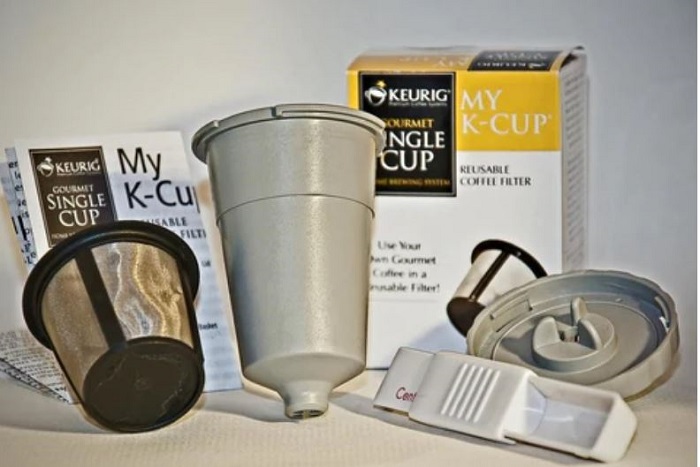
- Reusable Filters: Some Keurig machines, such as the Keurig My K-Cup Universal Reusable Coffee Filter, come with a reusable filter option. These filters are typically made of metal or durable plastic and can be filled with your choice of ground coffee. Reusable filters can be rinsed and reused for multiple brewing cycles. They offer the advantage of being more environmentally friendly and cost-effective in the long run, as you don’t need to purchase disposable filters.
It’s important to note that not all Keurig machines are compatible with reusable filters. Check the compatibility of your specific Keurig model and whether it supports the use of reusable filters.
If you have a disposable filter, it is not recommended to reuse it. Using a disposable filter beyond its intended lifespan may result in reduced performance and compromised taste. It’s best to replace disposable filters as instructed by the manufacturer.
If you have a reusable filter, follow the cleaning instructions provided by the manufacturer. Regularly rinse and clean the reusable filter to remove coffee grounds and oils that may accumulate over time. This helps maintain the performance and quality of your brews when using a reusable filter.
Always refer to the user manual or Keurig’s official guidelines specific to your machine and filter type for accurate information on reusability and maintenance.
We introduce How to Change Keurig Filter as above.
8. WHY DOES A KEURIG NEED A FILTER?
A Keurig coffee maker benefits from a filter for several reasons:
- Water Purification: The primary purpose of a filter in a Keurig is to purify the water used for brewing coffee. Tap water often contains impurities such as chlorine, minerals, and sediment that can affect the taste and quality of your coffee. The filter helps to remove these impurities, resulting in a cleaner and better-tasting cup of coffee.
- Flavor Enhancement: By removing impurities from the water, the filter can enhance the flavor profile of your coffee. It helps to ensure that the natural flavors of the coffee are not masked or altered by unwanted tastes from the water. This results in a more enjoyable and true representation of the coffee’s flavor.
- Equipment Protection: Using a filter in your Keurig can help protect the internal components of the machine. The filter prevents mineral buildup, sediment accumulation, and other debris from reaching the brewing system, including the puncturing needles. This helps to maintain the performance and longevity of your Keurig machine.
- Consistency: The presence of a filter in the Keurig machine helps to provide consistency in the brewing process. It helps standardize the quality of the water used for each cup, ensuring a consistent taste and flavor profile in every brew. This allows you to enjoy a reliable and predictable coffee experience with your Keurig.
- Improved Longevity: By using a filter, you can contribute to the long-term durability of your Keurig machine. The filter prevents mineral buildup that could potentially clog or damage internal components. Regularly replacing the filter and maintaining the machine’s cleanliness can help extend its lifespan and reduce the need for repairs or replacements.
While using a filter in your Keurig is not mandatory, it is highly recommended to enhance the taste, protect the machine, and maintain a consistent brewing experience. Regularly replacing the filter according to the manufacturer’s guidelines ensures optimal performance and helps you get the most out of your Keurig coffee maker.
You can see How to Change Keurig Filter as above.
9. WHAT HAPPENS IF YOU RUN KEURIG WITHOUT WATER?
Running a Keurig coffee maker without water can have several negative consequences:
- Potential Damage to the Machine: When the Keurig machine is operated without water, the heating element may become hot and could potentially overheat. This can lead to damage to the internal components of the machine, such as the heating element or pump. Operating the machine without water goes against its intended design and can result in costly repairs or the need for a replacement.
- Ineffective Brewing: Without water in the reservoir, the Keurig machine cannot properly brew coffee. The absence of water means there is no liquid to flow through the coffee pod and extract the flavors. This results in a failed brewing process and an empty cup without any coffee.
- Increased Risk of Malfunction: Running a Keurig machine without water can trigger its built-in safety mechanisms. The machine may detect the lack of water and automatically shut down or enter a protective mode to prevent damage. This can lead to interruption of the brewing process and require you to troubleshoot the machine before it can be used again.
- Impaired Taste: Proper water-to-coffee ratio is crucial for achieving a balanced and flavorful cup of coffee. Without water, the coffee will not be extracted correctly, resulting in a weak or tasteless brew. Even if you were to add water after realizing the mistake, the coffee quality may still be compromised.
To ensure the longevity and optimal performance of your Keurig machine, always make sure there is sufficient water in the reservoir before starting the brewing process. It is essential to follow the manufacturer’s instructions and guidelines for proper usage and maintenance.
You can refer How to Change Keurig Filter as above.
10. COMMON MISTAKES ON HOW TO CHANGE KEURIG FILTER.
When changing the Keurig filter, here are some common mistakes to avoid:
- Forgetting to Soak the New Filter: Some Keurig filters, especially the charcoal filters, need to be soaked in water before use. Soaking activates the charcoal and ensures optimal performance. Forgetting to soak the new filter can result in subpar filtration and potentially impact the taste of your coffee.
- Installing the Filter Incorrectly: When inserting the new filter into the filter holder, ensure it is properly aligned and fully seated. Failing to do so may result in water bypassing the filter or the filter not functioning effectively. Double-check that the filter is securely in place before reassembling the water reservoir.
- Not Rinsing the Filter Holder: Before inserting the new filter, take a moment to rinse the filter holder under running water. This helps remove any debris or residue that may have accumulated. Neglecting to rinse the filter holder may introduce contaminants into the fresh filter, reducing its effectiveness.
- Neglecting to Run a Rinse Cycle: After installing the new filter, it’s essential to run a rinse cycle without a K-Cup pod. This flushes out any air or loose particles in the brewing system and ensures that your first cup of coffee isn’t compromised. Skipping this step may result in an undesirable taste or brewing issues.
- Not Following the Recommended Replacement Schedule: Regularly changing the Keurig filter is important for maintaining the quality of your brewed coffee and the longevity of your machine. Neglecting to follow the manufacturer’s recommended replacement schedule can lead to decreased filtration efficiency and potentially impact the taste of your coffee.
- Using the Wrong Filter Type: Keurig offers different types of filters for specific models and needs. Using the wrong filter type may not fit properly or provide the intended filtration performance. Ensure that you are using the correct filter compatible with your specific Keurig machine model.
By avoiding these common mistakes, you can ensure a smooth and successful process when changing the Keurig filter, resulting in an improved coffee brewing experience. Always refer to the manufacturer’s instructions and guidelines specific to your Keurig machine for accurate information and proper filter replacement procedures.
Please see How to Change Keurig Filter as above.
FAQS ABOUT HOW TO CHANGE KEURIG FILTER.

Here are 8 frequently asked questions (FAQs) about how to change the Keurig filter, along with their answers:
1. Question 1: How often should I change the Keurig filter?
A: Keurig recommends changing the filter every two months or after brewing approximately 60 reservoirs’ worth of coffee. However, this may vary based on your usage and water quality. Replace the filter regularly to ensure optimal performance.
2. Question 2: Can I reuse a Keurig filter?
A: It depends on the type of filter. Disposable filters are not intended to be reused and should be replaced. However, some Keurig machines offer reusable filters that can be rinsed and reused for multiple brewing cycles.
Please refer How to Change Keurig Filter as above.
3. Question 3: Do I need to soak the new Keurig filter before using it?
A: Some Keurig filters, particularly charcoal filters, require soaking in water before use. Soaking activates the charcoal and ensures effective filtration. Follow the specific instructions provided with your filter or starter kit.
4. Question 4: Can I use my Keurig machine without a filter?
A: Yes, you can use your Keurig machine without a filter. However, using a filter helps improve the taste and quality of your coffee by removing impurities from the water. It is recommended to use a filter for a better brewing experience.
There are How to Change Keurig Filter as above.
5. Question 5: How do I know if my Keurig filter needs to be changed?
A: A general guideline is to replace the Keurig filter every two months or as recommended by the manufacturer. However, if you notice a decline in the taste or quality of your coffee or if the water flow becomes slow, it may be time to change the filter.
6. Question 6: Can I use any brand of filter in my Keurig machine?
A: It is recommended to use genuine Keurig filters that are specifically designed for your machine. Genuine filters ensure compatibility and optimal performance. Using other brands may not fit properly or provide the desired filtration.
7. Question 7: Do I need to run a rinse cycle after changing the Keurig filter?
A: Yes, it is recommended to run a rinse cycle without a K-Cup pod after changing the Keurig filter. This helps flush out any air or loose particles in the brewing system and ensures the filter is properly primed for brewing.
We introduce How to Change Keurig Filter as above.
8. Question 8: Can I clean the Keurig filter instead of replacing it?
A: Disposable filters are not meant to be cleaned and should be replaced. Reusable filters, on the other hand, can be cleaned according to the manufacturer’s instructions to remove coffee grounds and oils that may accumulate over time.
Remember to always refer to your machine’s user manual or Keurig’s official guidelines for specific instructions and recommendations regarding changing the filter in your particular Keurig model.
CONCLUSION.
In conclusion, changing the filter in your Keurig coffee maker is an important maintenance task that helps enhance the taste, quality, and performance of your brewed coffee. The filter plays a vital role in removing impurities from the water, resulting in a cleaner and more flavorful cup of coffee.
By following the recommended replacement schedule and proper installation procedures, you can ensure that your Keurig machine continues to deliver consistent and enjoyable coffee experiences. Additionally, paying attention to common mistakes and frequently asked questions can help you avoid any pitfalls and make the filter-changing process smoother.
Remember to consult your machine’s user manual or Keurig’s official guidelines specific to your model for accurate and detailed instructions. With a properly maintained filter, you can savor the full potential of your Keurig coffee maker and enjoy delicious, freshly brewed coffee every time.
Read more:
Top 8 Best Espresso Machine Under 200 Reviews in 2024
Top 7 Best Coffee Maker Under $100 Reviews in 2024
Top 7 Best Single Serve Coffee Maker No Pods Reviews in 2024