How to Use a Coffee Percolator? Good Tips and Guides in 2024
HOW TO USE A COFFEE PERCOLATOR? GOOD TIPS AND GUIDES IN 2024.
In the fast-paced modern world, where instant gratification often reigns supreme, there is something undeniably nostalgic and comforting about the classic art of brewing coffee with a percolator. For coffee enthusiasts seeking a more hands-on approach to crafting the perfect cup, the coffee percolator offers a charming and time-honored method that has stood the test of time.
Stepping into the world of coffee percolators takes us on a journey back to a simpler era when the aroma of freshly brewed coffee filled kitchens and sparked conversations. With its signature bubbling sounds and rich, full-bodied flavor, this method has retained its appeal and continues to be a beloved choice for those who appreciate the art of traditional coffee preparation.
In this comprehensive guide, we embark on a flavorful adventure to explore the ins and outs of using a coffee percolator. From choosing the right coffee grind to mastering the ideal brewing time, we unravel the secrets to brewing a cup that awakens the senses and warms the heart.
Whether you’re a seasoned coffee connoisseur or a curious beginner, join us as we journey into the captivating world of coffee percolators, rekindling the joy of brewing and savoring every last drop of this cherished beverage.

HOW TO USE A COFFEE PERCOLATOR?
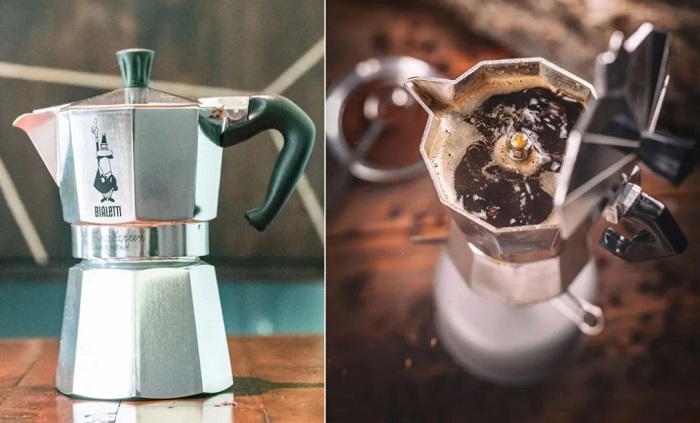
1. WHAT IS A COFFEE PERCOLATOR?
A coffee percolator is a classic and traditional coffee brewing device that has been used for many years to make coffee. It consists of a pot with a small chamber at the bottom where water is heated. A vertical tube runs from the bottom chamber to the top of the pot, where a perforated metal coffee basket or filter basket is attached.
The process of brewing coffee in a percolator involves the following steps:
- Water Filling: Water is added to the bottom chamber of the percolator.
- Coffee Grounds: Coarsely ground coffee is placed inside the metal coffee basket or filter basket.
- Assembling: The coffee basket is attached to the top of the vertical tube, and the lid is secured.
- Heating: The percolator is placed on a heat source, such as a stovetop or electric burner. As the water in the bottom chamber heats up, it starts to boil.
- Percolation: As the water boils, it is forced up the vertical tube and over the coffee grounds, dripping down through the grounds and back into the bottom chamber. This process is repeated continuously, creating a circulation of water through the coffee grounds.
- Brewing Time: The coffee percolates for a specific period, typically ranging from a few minutes to several minutes, depending on personal preference and the desired strength of the coffee.
- Serving: Once the brewing is complete, the percolator is removed from the heat source, and the coffee is ready to be poured and served.
Coffee percolators were widely used in the past, but they have become less popular with the rise of other brewing methods, such as drip coffee makers and espresso machines. However, many coffee enthusiasts still appreciate the nostalgic charm and unique taste of coffee brewed in a percolator, making it a cherished method for those seeking a traditional coffee experience.
You can see How to Use a Coffee Percolator as below.
2. WHAT ARE BENEFITS OF COFFEE PERCOLATOR?
Using a coffee percolator offers several benefits for coffee enthusiasts who appreciate a traditional and hands-on brewing method. Here are some advantages of using a coffee percolator:
- Nostalgic Charm: Coffee percolators evoke a sense of nostalgia, taking coffee lovers back to a simpler era when the rich aroma of freshly brewed coffee filled kitchens and homes. For those seeking a sentimental and comforting coffee experience, using a percolator can be a delightful choice.
- Full-Bodied Flavor: The percolation process involves continuous circulation of water through the coffee grounds, allowing for longer extraction times. This results in a robust and full-bodied flavor profile, which can be appealing to those who enjoy a bold cup of coffee.
- Control Over Brewing Time: With a percolator, you have more control over the brewing time and can customize the strength of your coffee to suit your preferences. Adjusting the brewing time allows you to fine-tune the taste according to your desired richness.
- No Paper Filters Required: Unlike some other brewing methods that use paper filters, coffee percolators typically do not require any disposable filters. This reduces waste and is more environmentally friendly.
- Stovetop or Portable Use: Percolators are versatile and can be used on stovetops or other heat sources, making them ideal for camping trips, outdoor adventures, or places with limited access to electricity.
- Easy Maintenance: Percolators are relatively simple devices with minimal parts, making them easy to clean and maintain.
- Cost-Effective: Coffee percolators are generally more affordable than some high-end coffee brewing equipment, making them a cost-effective option for those on a budget.
- Traditional Coffee Experience: Using a coffee percolator offers a traditional coffee-brewing experience, allowing you to engage with the brewing process and connect with the art of making coffee.
It’s important to note that while coffee percolators have their unique benefits, they may not be everyone’s preferred brewing method. The prolonged brewing time and continuous circulation of water through the coffee grounds can sometimes result in over-extraction and bitter flavors. Additionally, the coarser grind required for percolators may lead to more sediment in the final cup.
Ultimately, the choice of using a coffee percolator depends on individual taste preferences and the desire for a traditional coffee experience. For those who appreciate the classic charm and rich flavor profile it offers, a coffee percolator can be a cherished addition to their coffee-brewing repertoire.
You can refer How to Use a Coffee Percolator as below.
3. HOW MANY TYPES OF COFFEE PERCOLATOR?
There are several types of coffee percolators, each with its own design and method of brewing. The main types of coffee percolators include:
- Stovetop Percolators: Stovetop percolators are the most common type of coffee percolators. They consist of a metal or stainless steel pot with a vertical tube, coffee basket, and a perforated metal filter. Stovetop percolators are placed directly on a stovetop or other heat source for brewing.
- Electric Percolators: Electric percolators work similarly to stovetop percolators, but they have an electric heating element built into the base. They can be plugged into an electrical outlet, allowing for automated heating and brewing.
- Campfire Percolators: Campfire percolators are specifically designed for outdoor use. They are made from durable materials and can be placed over a campfire or other open flames for brewing coffee during camping trips or outdoor adventures.
- Pump Percolators: Pump percolators, also known as vacuum percolators, use a pump or siphon system to circulate water between two chambers. The coffee grounds are placed in a filter between the chambers, and water is forced through the grounds using the pump or siphon action.
- Moka Pots: Moka pots, also known as stovetop espresso makers, are not traditional percolators, but they operate on a similar principle. They have three chambers: a water chamber, a coffee basket, and a collection chamber. As water is heated, it creates steam that forces water through the coffee grounds and into the collection chamber, resulting in a strong and concentrated coffee similar to espresso.
- Automatic Percolators: Some modern coffee makers have percolation capabilities, where water is heated and cycled through the coffee grounds automatically. These machines may have additional features such as timers and temperature control.
Each type of coffee percolator may have its unique advantages and brewing characteristics. The choice of which type to use depends on individual preferences, brewing preferences, and the desired coffee experience. Whether it’s a classic stovetop percolator, an electric version for convenience, or a campfire percolator for outdoor adventures, each type of coffee percolator can offer a distinct and enjoyable coffee-brewing experience.
Please see How to Use a Coffee Percolator as below.
4. WHAT SHOULD WE CONSIDER BEFORE BUYING COFFEE PERCOLATOR?
Before buying a coffee percolator, there are several factors to consider ensuring that you choose the right type and model that best suits your needs and preferences. Here are some important things to consider before making your purchase:
- Brewing Capacity: Determine how much coffee you typically brew at once. Coffee percolators come in various sizes, so choose one that can accommodate the amount of coffee you need to make for yourself or your household.
- Type of Percolator: Decide on the type of percolator that suits your lifestyle and brewing preferences. Consider whether you want a stovetop percolator, an electric model, or a campfire percolator for outdoor use.
- Material and Durability: Look for a percolator made from high-quality materials like stainless steel or aluminum, as they are durable and resistant to rust and corrosion. Avoid percolators made from cheap plastic materials that may affect the taste of the coffee.
- Heat Source Compatibility: If you opt for a stovetop percolator, ensure that it is compatible with the type of stovetop you have, whether it’s gas, electric, or induction.
- Ease of Use: Consider how user-friendly the percolator is. Look for features like clear water level indicators, comfortable handles, and easy-to-clean parts.
- Brewing Time and Temperature Control: Some electric percolators may offer temperature and brewing time control, allowing you to adjust the brewing process to your preference.
- Filter Type: Check the type of filter used in the percolator. Some models come with built-in metal filters, while others use disposable paper filters. Decide which type suits your preferences and whether the filter is easy to clean and maintain.
- Brand Reputation: Research the brand’s reputation and read customer reviews to ensure that you are buying a reliable and well-regarded product.
- Price and Budget: Determine your budget and compare prices among different models. While expensive percolators may have additional features, there are affordable options that provide excellent brewing results.
- Warranty and Customer Support: Check the warranty period and the availability of customer support in case you encounter any issues with the percolator.
- Safety Features: Look for safety features, especially for electric percolators, such as automatic shut-off when the brewing process is complete.
By considering these factors, you can make an informed decision and find a coffee percolator that meets your specific requirements, providing you with a delightful and rewarding coffee-brewing experience.
Please refer How to Use a Coffee Percolator as below.
5. HOW TO USE A COFFEE PERCOLATOR?
Using a coffee percolator is a straightforward process, but it requires a bit of attention to ensure you get the perfect cup of coffee. Here’s a step-by-step guide on how to use a stovetop coffee percolator:
What You’ll Need:
- Coffee percolator
- Coarsely ground coffee
- Water
- Heat source (stove or campfire)
- Coffee mug or carafe
Step 1: Prepare the Percolator:
- Disassemble the percolator by removing the lid, the coffee basket, and the vertical tube.
Step 2: Add Water:
- Fill the bottom chamber of the percolator with cold water. The amount of water you add depends on the size of your percolator and the number of cups of coffee you want to brew. Refer to the percolator’s user manual for specific measurements.
Step 3: Insert Coffee Grounds:
- Place the metal coffee basket or filter basket on the top of the vertical tube.
- Add coarsely ground coffee to the coffee basket. Use about 1 tablespoon of coffee grounds for each cup of water. Adjust the amount to your taste preferences.
Step 4: Assemble the Percolator:
- Slide the vertical tube with the coffee basket back into the percolator.
- Place the lid on the percolator and ensure it is secured tightly.
Step 5: Heat the Percolator:
- Place the percolator on a heat source (stove or campfire) and turn on the heat to a medium setting.
Step 6: Percolation Process:
- As the water in the bottom chamber heats up, it will start to boil.
- The boiling water is forced up the vertical tube and over the coffee grounds, dripping down through the grounds and back into the bottom chamber.
- The percolation process creates a continuous cycle of water flowing through the coffee grounds.
Step 7: Monitor the Percolation:
- Pay attention to the percolation process. You will notice the water starting to change color as it absorbs the coffee’s flavors.
Step 8: Adjust Brewing Time:
- The brewing time varies depending on personal preferences and desired coffee strength. As a general guideline, start with a brewing time of about 5-8 minutes.
- If you prefer a stronger cup of coffee, you can extend the brewing time slightly.
Step 9: Remove from Heat:
- Once the coffee has reached your desired strength, remove the percolator from the heat source.
Step 10: Serve the Coffee:
- Carefully pour the brewed coffee into a coffee mug or carafe, using caution as the percolator and coffee may be hot.
- Your freshly brewed coffee from the percolator is now ready to be enjoyed.
Step 11: Clean the Percolator:
- After use, allow the percolator to cool down before disassembling it for cleaning.
- Wash the different parts of the percolator with warm, soapy water, or follow the manufacturer’s cleaning instructions.
With these simple steps, you can enjoy the nostalgic and flavorful experience of brewing coffee with a percolator. Remember that practice makes perfect, and you can adjust the coffee grind, brewing time, and coffee-to-water ratio to find the perfect cup that suits your taste preferences. Happy percolating!
There are How to Use a Coffee Percolator as above.
6. HOW TO CLEAN A COFFEE PERCOLATOR?
Cleaning a coffee percolator is essential to maintain its performance and ensure that you continue to brew great-tasting coffee. Regular cleaning prevents coffee residue and oils from building up, which can affect the flavor of your future brews. Here’s a step-by-step guide on how to clean a coffee percolator:
What You’ll Need:
- Warm, soapy water
- Soft sponge or brush
- White vinegar or baking soda (optional)
- Soft cloth or towel
- Toothpicks or small brushes (for hard-to-reach areas)
Step 1: Allow the Percolator to Cool Down:
- Before cleaning the percolator, make sure it has cooled down to avoid any risk of burns.
Step 2: Disassemble the Percolator:
- Remove the lid, the coffee basket, and the vertical tube from the percolator. Take care not to spill any leftover coffee grounds.
Step 3: Hand Wash the Parts:
- Wash the different parts of the percolator, such as the lid, coffee basket, and vertical tube, with warm, soapy water.
- Use a soft sponge or brush to gently scrub away any coffee residue and oils.
Step 4: Clean the Percolator’s Interior:
- Pay special attention to the interior of the percolator, including the bottom chamber and the vertical tube.
- If there are any stubborn stains or residue, you can mix a solution of equal parts water and white vinegar or water and baking soda.
- Pour the solution into the bottom chamber and vertical tube and let it sit for a few minutes to help loosen the buildup.
- Afterward, rinse thoroughly with clean water.
Step 5: Clean Hard-to-Reach Areas:
- Use toothpicks or small brushes to clean any hard-to-reach areas, such as the tiny holes in the coffee basket or the inside of the vertical tube.
Step 6: Rinse Thoroughly:
- Rinse all the parts and the interior of the percolator thoroughly with clean water to remove any cleaning solution or residue.
Step 7: Dry the Percolator:
- Use a soft cloth or towel to dry all the parts of the percolator thoroughly.
- Make sure that there is no moisture left inside the percolator before reassembling it.
Step 8: Reassemble the Percolator:
- Put the coffee basket back onto the vertical tube and then place the assembled tube back into the bottom chamber.
- Secure the lid tightly on the top of the percolator.
Step 9: Store the Percolator:
- Store the clean and dry percolator in a cool, dry place until the next use.
Regular cleaning after each use and periodic deep cleaning will help keep your coffee percolator in excellent condition and ensure that you continue to brew flavorful and aromatic coffee with each batch.
We introduce How to Use a Coffee Percolator as above.
7. SOME COFFEE TYPES FOR COFFEE PERCOLATOR.
When using a coffee percolator, it’s essential to choose the right coffee grind and types of coffee beans to achieve the best flavor and brewing results. Here are some recommended coffee types that work well with a coffee percolator:
- Medium to Coarse Coffee Grind: For a coffee percolator, it’s best to use a medium to coarse coffee grind. Avoid using finely ground coffee, as it can lead to over-extraction and result in bitter-tasting coffee.
- Whole Bean Coffee: For the freshest and most flavorful coffee, consider using whole bean coffee and grinding it just before brewing. This allows you to control the grind size and maintain the coffee’s aroma and flavors.
- Dark Roast Coffee: Dark roast coffee beans are popular for percolators due to their robust and bold flavors. The percolation process extracts more of the coffee’s oils and compounds, accentuating the rich flavors of dark roasts.
- Espresso Roast Coffee: If you prefer a stronger and more concentrated brew, you can try using espresso roast coffee beans. The percolator can extract the intense flavors from these beans, creating a potent and flavorful cup of coffee.
- Blend of Coffee Beans: Experiment with different coffee blends to discover unique flavor profiles. Blends that combine beans from various regions and with different roasting levels can create a well-rounded and balanced cup of coffee.
- Single-Origin Coffee: If you enjoy exploring the distinctive flavors of specific coffee-growing regions, consider using single-origin coffee beans. Each origin offers a unique taste profile that can be accentuated by the percolation process.
- Decaffeinated Coffee: If you prefer to enjoy coffee without the caffeine, there are decaffeinated coffee options available that are suitable for use in a coffee percolator.
When using a coffee percolator, it’s important to remember that the coarseness of the coffee grind, the type of beans, and the brewing time can all influence the flavor of the final cup. Feel free to experiment with different coffee types and brewing parameters to find the perfect combination that suits your taste preferences.
Whether you prefer a strong and bold cup or a milder, smoother brew, a coffee percolator offers a classic and enjoyable way to savor your favorite coffee flavors.
Above is information about How to Use a Coffee Percolator. Now, let’s see some tips and guides on How to Use a Coffee Percolator as below.
TIPS AND GUIDES ON HOW TO USE A COFFEE PERCOLATOR.

1. SOME TIPS ON HOW TO USE A COFFEE PERCOLATOR.
Here are some useful tips on how to use a coffee percolator to achieve the best results and a flavorful cup of coffee:
- Use Fresh Coffee: Always use freshly roasted coffee beans or freshly ground coffee for the best flavor. Stale coffee can result in a less aromatic and less enjoyable cup.
- Choose the Right Grind: Use a medium to coarse coffee grind for the percolator. Avoid using fine grinds, as they may lead to over-extraction and bitterness.
- Measure Coffee and Water: Follow the recommended coffee-to-water ratio for your percolator to get the desired strength. A common guideline is about 1 tablespoon of coffee grounds per 6 ounces of water, but you can adjust according to your taste preferences.
- Preheat the Water: Preheat the water in the bottom chamber of the percolator before starting the brewing process. This helps to maintain a consistent temperature throughout the percolation.
- Monitor the Percolation: Keep a close eye on the percolation process to avoid over-extraction. As soon as you notice a rich and dark color, you can remove the percolator from the heat source.
- Control the Brewing Time: Adjust the brewing time to achieve your preferred strength. Shorten or lengthen the percolation time as needed.
- Use a Heat Diffuser (for Stovetop Percolators): If you’re using a stovetop percolator and find that the heat is too high, consider using a heat diffuser to distribute the heat evenly and prevent overheating.
- Avoid Boiling the Coffee: Try not to let the coffee boil for an extended period, as this can lead to over-extraction and a bitter taste. The ideal temperature range for percolation is around 195-205°F (90-96°C).
- Experiment with Coffee Types: Explore different coffee beans and blends to find your favorite flavors for the percolator. Dark roast, espresso roast, single-origin, or blends can all offer unique taste profiles.
- Clean the Percolator Regularly: After each use, clean the percolator thoroughly to remove any coffee residue. This helps to maintain the percolator’s performance and ensures a clean, flavorful brew.
- Enjoy Immediately: Coffee brewed in a percolator is best enjoyed immediately after brewing to savor its full aroma and flavors.
By following these tips, you can enhance your coffee percolator experience and delight in a rich, full-bodied cup of coffee that captures the timeless charm of this classic brewing method. Happy percolating!
You can see How to Use a Coffee Percolator as above.
2. WHAT IS THE PURPOSE OF A COFFEE PERCOLATOR?
The purpose of a coffee percolator is to brew coffee using a traditional and hands-on method that involves continuous circulation of hot water through coffee grounds to extract the flavors and aromas. The main purpose and benefits of a coffee percolator include:
- Rich and Full-Bodied Flavor: Coffee percolators are known for producing a rich and full-bodied cup of coffee. The percolation process allows the water to circulate through the coffee grounds multiple times, resulting in a robust flavor profile.
- Nostalgic Experience: Coffee percolators evoke a sense of nostalgia, harkening back to a time when brewing coffee was a cherished ritual. For many, using a percolator brings back fond memories of family gatherings and cozy mornings.
- Versatility: Coffee percolators are versatile and can be used on stovetops, electric burners, or campfires. This makes them suitable for use in various settings, including home kitchens and outdoor adventures.
- No Need for Filters: Most coffee percolators do not require paper filters, which can be an eco-friendly choice as it reduces waste.
- Control Over Brewing Time: With a coffee percolator, you have control over the brewing time, allowing you to customize the strength of your coffee according to your preferences.
- Traditional Coffee Experience: Using a coffee percolator offers a more hands-on and traditional coffee-brewing experience. It allows coffee enthusiasts to engage with the brewing process and appreciate the artistry behind making coffee.
- Portability: Some coffee percolators, especially stovetop and campfire percolators, are portable and can be taken on camping trips or outdoor excursions.
- Nostalgic Aroma: The percolation process fills the air with the rich aroma of freshly brewed coffee, enhancing the overall coffee experience.
While coffee percolators have been overshadowed by other brewing methods in recent years, they still hold a special place in the hearts of those who appreciate the timeless charm and the unique flavor profile they offer. The purpose of a coffee percolator is to provide a classic and enjoyable way to brew coffee, allowing coffee enthusiasts to relish the rich history and tradition of coffee preparation.
You can refer How to Use a Coffee Percolator as above.
3. ARE COFFEE PERCOLATORS EASY TO USE?
Using a coffee percolator can be relatively easy, but it may require some practice and attention to detail to achieve the best results. The basic steps of using a coffee percolator involve adding water, coffee grounds, and then brewing the coffee. Here’s a breakdown of the process:
- Add Water: Fill the bottom chamber of the percolator with water, making sure not to overfill it. The amount of water will depend on the size of the percolator and the number of cups of coffee you want to make.
- Add Coffee Grounds: Place the coffee basket or filter basket on top of the vertical tube in the percolator. Add coarsely ground coffee to the basket, using the recommended amount for your desired strength.
- Assemble the Percolator: Put the vertical tube with the coffee basket back into the bottom chamber. Make sure the pieces fit securely.
- Heat the Percolator: Place the percolator on a heat source, such as a stovetop or campfire, and turn on the heat to a medium setting. The water will start to boil and percolate through the coffee grounds.
- Monitor the Percolation: Keep an eye on the percolation process to avoid over-extraction. Once the coffee has reached your preferred strength, remove the percolator from the heat source.
- Serve the Coffee: Carefully pour the brewed coffee into cups or a carafe and enjoy your freshly brewed coffee.
While the basic steps are straightforward, there are a few factors to consider for a successful brew:
- Grind Size: Using the right grind size is crucial. Coarsely ground coffee is recommended for percolators. If the grind is too fine, the coffee may become over-extracted and taste bitter.
- Brewing Time: Pay attention to the brewing time and remove the percolator from the heat source once the coffee reaches your desired strength. Leaving it too long on the heat can lead to over-extraction.
- Water Temperature: Try to maintain the water temperature between 195-205°F (90-96°C) during percolation. Avoid boiling the water vigorously, as it can negatively affect the taste.
With a bit of practice and understanding of these factors, using a coffee percolator can become a simple and enjoyable process, providing you with a rich and flavorful cup of coffee that captures the nostalgic charm of this traditional brewing method.
Please see How to Use a Coffee Percolator as above.
4. WHAT IS THE DISADVANTAGE OF A PERCOLATOR?
While coffee percolators have their unique charm and benefits, they also have some disadvantages that may not suit everyone’s preferences or brewing needs. Here are some of the main disadvantages of using a coffee percolator:
- Over-Extraction and Bitterness: Percolators continuously cycle hot water through the coffee grounds, which can lead to over-extraction if not carefully monitored. Over-extraction can result in a bitter and unpleasant taste in the brewed coffee.
- Inconsistent Brew: Achieving consistent results with a percolator can be challenging, especially if the brewing time or temperature is not carefully controlled. This may lead to variations in the taste of the coffee from one brew to another.
- Sediment in Coffee: The percolation process can sometimes lead to coffee grounds finding their way into the brewed coffee, resulting in a slightly gritty or sediment-filled cup.
- Lack of Precision: Percolators offer limited control over variables such as water temperature, brew time, and coffee-to-water ratio. This lack of precision may not appeal to coffee enthusiasts who prefer more control over their brewing process.
- Time-Consuming: Percolation can take longer than other brewing methods, such as drip coffee makers or espresso machines. This might not be ideal for those seeking a quick cup of coffee.
- Not Ideal for Light Roasts: Percolators tend to extract coffee oils and compounds vigorously, making them less suitable for delicate and light roast coffees. Light roasts may become overwhelmed by the percolation process, resulting in an imbalanced cup.
- Cleaning Complexity: Percolators can have more parts to clean compared to other brewing devices. The coffee basket, filter, and vertical tube require careful cleaning to prevent the buildup of coffee residue.
- Not Energy-Efficient: Stovetop percolators require a heat source, which may not be as energy-efficient as other brewing methods, especially for electric percolators.
Despite these disadvantages, many coffee enthusiasts still appreciate the classic appeal and unique flavor profile that percolators offer. While percolators may not be the most precise or modern brewing method, their nostalgic charm and full-bodied coffee experience continue to attract those who enjoy a traditional and hands-on approach to making coffee.
Please refer How to Use a Coffee Percolator as above.
5. DOES COFFEE TASTE BETTER IN A PERCOLATOR?
Whether coffee tastes better in a percolator is subjective and depends on individual preferences. Some people enjoy the rich and full-bodied flavor that a percolator can produce, while others may prefer different brewing methods that offer different taste profiles.
The percolation process involves continuously circulating hot water through the coffee grounds, which can extract more of the coffee’s oils and compounds, resulting in a robust and bold flavor. This can be appealing to those who enjoy a strong and intense cup of coffee.
However, the percolation process can also lead to over-extraction if not carefully monitored, which may result in a bitter taste. Additionally, some coffee enthusiasts may prefer more subtle and delicate flavor notes that can be achieved through other brewing methods, such as pour-over or espresso.
Ultimately, the taste of coffee from a percolator is influenced by various factors, including the coffee grind size, the type of beans used, the brewing time, and the water temperature. Additionally, individual taste preferences play a significant role in determining whether one finds the coffee brewed in a percolator to be the most enjoyable.
To determine if coffee tastes better in a percolator for yourself, consider experimenting with different coffee types, grind sizes, and brewing times to find the flavor profile that suits your taste buds best. Coffee is a highly personal preference, and what tastes best to one person may not be the same for another. Enjoy the journey of discovering your favorite coffee brewing method and flavor profile!
There are How to Use a Coffee Percolator as above.
6. IS PERCOLATED COFFEE BETTER THAN INSTANT?
Whether percolated coffee is better than instant coffee is a matter of personal preference and what you value in your coffee experience. Both brewing methods have their unique characteristics, and what one person considers “better” may differ from another’s opinion. Here are some factors to consider when comparing percolated and instant coffee:
- Flavor and Aroma:
- Percolated Coffee: Percolated coffee tends to have a fuller and richer flavor profile. The percolation process extracts more coffee oils and compounds, resulting in a robust taste and aroma that many coffee enthusiasts enjoy.
- Instant Coffee: Instant coffee is made from brewed coffee that has been freeze-dried or spray-dried. While it is convenient, its flavor and aroma may be more subdued compared to percolated coffee.
- Convenience:
- Percolated Coffee: Brewing coffee with a percolator takes more time and effort compared to making instant coffee. It requires assembling the percolator, monitoring the percolation process, and cleaning afterward.
- Instant Coffee: Instant coffee is incredibly convenient and quick to prepare. You only need to add hot water to the coffee granules, and your cup is ready to enjoy.
- Customization:
- Percolated Coffee: With a percolator, you have more control over variables such as coffee grind size, brewing time, and coffee-to-water ratio, allowing you to customize your coffee according to your preferences.
- Instant Coffee: Instant coffee offers limited customization options, as the coffee is already pre-processed and packaged.
- Cost:
- Percolated Coffee: Brewing coffee with a percolator may require purchasing the percolator itself and using coffee beans or grounds, which can be more expensive than instant coffee.
- Instant Coffee: Instant coffee is generally more affordable and budget-friendly.
- Nostalgia and Experience:
- Percolated Coffee: Using a coffee percolator provides a traditional and hands-on coffee-brewing experience, which can be nostalgic and enjoyable for those who appreciate the ritual of making coffee.
- Instant Coffee: While it lacks the ritual of traditional brewing, instant coffee is convenient and easily accessible, making it a popular choice for those on the go or with limited time.
Ultimately, whether percolated coffee is better than instant coffee depends on what you value in your coffee experience—flavor complexity, hands-on preparation, customization options, or convenience. Both methods have their merits and can offer satisfying cups of coffee in their own right. It’s essential to try both and decide which one best suit your taste preferences and lifestyle.
We introduce How to Use a Coffee Percolator as above.
7. IS PERCOLATOR COFFEE BETTER THAN DRIP?
Whether percolator coffee is better than drip coffee is a matter of personal preference and what specific characteristics you value in your coffee. Both brewing methods have their unique advantages and flavor profiles. Here are some points to consider when comparing percolator and drip coffee:
- Flavor Profile:
- Percolator Coffee: Percolated coffee tends to have a robust and full-bodied flavor due to the continuous circulation of water through the coffee grounds. Some people enjoy the bold taste and stronger aroma that percolators produce.
- Drip Coffee: Drip coffee often offers a cleaner and smoother flavor. Drip machines use a more controlled process, resulting in a balanced cup of coffee with fewer oils and sediments.
- Control Over Brewing:
- Percolator Coffee: With a percolator, you have more control over the brewing time and water temperature, allowing you to adjust the strength of your coffee according to your preference.
- Drip Coffee: Drip machines are generally more automated and precise, which can provide consistency in each brew but may offer less control over individual brewing variables.
- Convenience:
- Percolator Coffee: Brewing with a percolator can be more time-consuming and requires monitoring the percolation process.
- Drip Coffee: Drip machines are convenient and require minimal effort. Once set up, you can walk away and let the machine do the brewing.
- Sediment and Clean-Up:
- Percolator Coffee: Percolators may sometimes produce coffee with sediment, especially if the grind size is not appropriate. Cleaning the percolator can involve more parts and effort.
- Drip Coffee: Drip machines usually produce cleaner coffee with fewer sediments, and they are generally easier to clean.
- Cost:
- Percolator Coffee: Coffee percolators can vary in price, and using ground coffee or whole beans may be more expensive than using drip coffee filters or pre-ground coffee.
- Drip Coffee: Drip machines are available in various price ranges, and using drip coffee filters or pre-ground coffee can be more cost-effective.
Ultimately, the preference for percolator or drip coffee comes down to personal taste, brewing preferences, and the experience you seek in your coffee ritual. If you enjoy a bolder and more hands-on brewing experience with more control over variables, a percolator might be a good fit.
On the other hand, if you prefer a cleaner and more automated process with consistent results, a drip coffee maker may be more suitable.
Both percolator and drip coffee brewing methods have their merits and can produce delicious cups of coffee. It’s worth trying both methods to see which one aligns better with your taste and lifestyle.
You can see How to Use a Coffee Percolator as above.
8. HOW LONG DO PERCOLATORS TAKE TO MAKE COFFEE?
The time it takes for a percolator to make coffee can vary depending on various factors, including the type of percolator, the amount of water used, the desired strength of the coffee, and the heat source. On average, a percolator can take anywhere from 5 to 15 minutes to brew a pot of coffee.
Here’s a general breakdown of the percolation process and the time involved:
- Preparation: Assembling the percolator, adding water, and coffee grounds typically takes a couple of minutes.
- Heating the Water: The time it takes for the water in the percolator’s bottom chamber to heat up will depend on the heat source. It usually takes a few minutes to reach the boiling point.
- Percolation Process: Once the water reaches the boiling point, the percolation process starts, where hot water is forced up through the coffee grounds and then drips back down into the bottom chamber. The time required for percolation varies based on the desired strength of the coffee, but it typically takes 3 to 8 minutes.
- Brewing Time: The overall brewing time for a percolator can range from 5 to 15 minutes, depending on the factors mentioned above.
It’s important to note that monitoring the percolation process is crucial to avoid over-extraction, which can lead to a bitter taste in the coffee. The brewing time can be adjusted by controlling the heat source and the duration of percolation.
Some electric percolators come with a built-in timer or an automatic shut-off feature, which can help regulate the brewing time and ensure consistent results.
Keep in mind that the brewing time in a percolator may be longer than other coffee brewing methods, such as drip coffee makers or espresso machines. The trade-off is the unique and robust flavor that percolators can offer, which some coffee enthusiasts find enjoyable and worth the wait.
You can refer How to Use a Coffee Percolator as above.
9. WHY DON’T PEOPLE USE PERCOLATORS ANYMORE?
While coffee percolators have their unique charm and advantages, their popularity has decreased over the years for several reasons:
- Brewing Consistency: Percolators can be challenging to use for achieving consistent results. The percolation process involves continuous circulation of water through the coffee grounds, which can lead to over-extraction and a bitter taste if not carefully monitored. Other brewing methods, such as drip coffee makers or espresso machines, offer more precise and controlled brewing, producing consistent cups of coffee.
- Taste Preferences: Coffee enthusiasts have diverse taste preferences, and not everyone enjoys the robust and full-bodied flavor that percolators produce. Some people prefer milder and more delicate flavors that can be achieved through other brewing methods.
- Convenience and Efficiency: Percolators can be more time-consuming and require more effort compared to modern coffee brewing methods. Drip coffee makers, espresso machines, and single-serve coffee systems offer convenience and faster brewing times, making them popular choices for people with busy lifestyles.
- Sediment Concerns: Percolators can sometimes produce coffee with sediment or coffee grounds finding their way into the brewed coffee. This may not be appealing to those who prefer a cleaner cup of coffee.
- Technological Advancements: With advancements in coffee brewing technology, new methods and machines have been introduced that offer greater control over variables like temperature, water flow, and brewing time. These innovations have provided coffee enthusiasts with more ways to explore and enjoy different flavors.
- Wider Variety of Brewing Devices: Today, there is a vast array of coffee brewing devices available, each offering a unique coffee experience. From pour-over brewers to French presses, espresso machines to capsule-based systems, coffee lovers have numerous options to suit their individual tastes and preferences.
- Eco-Friendly Considerations: Percolators often require paper filters or produce more waste compared to some other brewing methods, such as reusable metal filters or cloth filters.
While the popularity of percolators has declined, they still hold a special place in the hearts of those who appreciate the nostalgic appeal and the strong, bold coffee they produce. Additionally, there is a resurgence of interest in traditional and artisanal coffee brewing methods, and some coffee enthusiasts enjoy using percolators to revisit the classic coffee-making experience.
Please see How to Use a Coffee Percolator as above.
10. COMMON MISTAKES ON HOW TO USE A COFFEE PERCOLATOR.
Using a coffee percolator might seem straightforward, but there are some common mistakes that can impact the quality of the brewed coffee. Here are some mistakes to avoid when using a coffee percolator:
- Using Incorrect Grind Size: Using finely ground coffee in a percolator can lead to over-extraction and result in bitter-tasting coffee. It’s essential to use a medium to coarse grind size to prevent this.
- Overfilling the Percolator: Adding too much water to the percolator can cause it to overflow during the brewing process. Be mindful of the maximum capacity of your percolator and avoid overfilling it.
- Neglecting the Water Temperature: Percolators work best with water temperatures between 195-205°F (90-96°C). Boiling the water vigorously can lead to over-extraction and a bitter taste. Monitor the water temperature to ensure it’s within the ideal range.
- Ignoring the Brewing Time: Leaving the percolator on the heat source for too long can over-extract the coffee and make it taste bitter. Pay attention to the brewing time and remove the percolator from the heat once the coffee reaches your desired strength.
- Not Cleaning the Percolator Properly: Neglecting to clean the percolator thoroughly after each use can lead to coffee residue buildup, affecting the flavor of future brews. Clean all the parts of the percolator with warm, soapy water and remove any coffee grounds or oils.
- Using Stale Coffee: Coffee tastes best when made with fresh beans or freshly ground coffee. Using stale coffee can result in a less aromatic and less enjoyable cup.
- Not Assembling the Percolator Correctly: Make sure to assemble the percolator properly before brewing. Loose parts or improper assembly can lead to leaks or uneven brewing.
- Using Low-Quality Coffee: The quality of the coffee beans you use directly impacts the flavor of your brewed coffee. Invest in good-quality coffee beans or grounds for a better coffee experience.
- Allowing Boiling Water to Re-circulate: Some percolators have a boiling process that causes hot water to re-circulate through the coffee grounds. This can lead to over-extraction and a bitter taste. If your percolator has this feature, avoid using it or reduce the heat to prevent excessive boiling.
- Not Adjusting Brewing Variables: Coffee preferences vary, and you may need to adjust the grind size, coffee-to-water ratio, or brewing time to suit your taste. Experiment with these variables to find your ideal cup.
By being mindful of these common mistakes, you can enhance your coffee percolator experience and enjoy a flavorful and aromatic cup of coffee with each brew.
Please refer How to Use a Coffee Percolator as above.
FAQS ABOUT HOW TO USE A COFFEE PERCOLATOR.

Here are 6 frequently asked questions (FAQs) about how to use a coffee percolator:
1. Question 1: How much coffee should I use in a coffee percolator?
A: The amount of coffee to use in a percolator depends on the size of your percolator and your desired strength. As a general guideline, use approximately 1 tablespoon of coarsely ground coffee per 6 ounces of water. Adjust the amount to suit your taste preferences.
2. Question 2: Can I use finely ground coffee in a coffee percolator?
A: It is best to avoid using finely ground coffee in a percolator. Finely ground coffee can lead to over-extraction, resulting in bitter-tasting coffee. Stick to a medium to coarse grind size for the best results.
There are How to Use a Coffee Percolator as above.
3. Question 3: How do I know when the coffee is ready in a percolator?
A: The percolation process usually takes 3 to 8 minutes. You can monitor the brewing progress by looking through the glass top or checking the color of the coffee through the clear knob. Once the coffee reaches your desired strength, remove the percolator from the heat source.
4. Question 4: Can I adjust the brewing time in a coffee percolator?
A: Yes, you can adjust the brewing time to control the strength of your coffee. Shorter brewing times will result in milder coffee, while longer brewing times will yield a stronger brew. Experiment with different brewing times to find your preferred taste.
Please see How to Use a Coffee Percolator as above.
5. Question 5: Should I use boiling water in the percolator?
A: It’s best to avoid using vigorously boiling water in the percolator. The ideal water temperature for percolation is between 195-205°F (90-96°C). Boiling water too vigorously can lead to over-extraction and a bitter taste. Maintain the water temperature within this range for the best results.
6. Question 6: How do I clean a coffee percolator?
A: Cleaning a coffee percolator is essential to maintain its performance and flavor. After each use, disassemble the percolator and hand wash all the parts with warm, soapy water. Pay attention to cleaning the coffee basket, vertical tube, and the bottom chamber.
Rinse thoroughly with clean water and dry all the parts before reassembling the percolator. Regular cleaning prevents coffee residue buildup and ensures a clean, flavorful brew.
We introduce How to Use a Coffee Percolator as above.
CONCLUSION.
In conclusion, using a coffee percolator can offer a nostalgic and enjoyable coffee brewing experience. While percolators may not be as widely used as other modern brewing methods, they still hold a special place in the hearts of many coffee enthusiasts who appreciate their unique flavor profile and the sense of tradition they bring.
To make the most of your coffee percolator, avoid common mistakes such as using finely ground coffee, overfilling the percolator, neglecting water temperature, and not monitoring the brewing time. Instead, focus on using a medium to coarse grind, controlling the water temperature, adjusting the brewing time to your taste, and using fresh and quality coffee beans.
Percolators provide the opportunity to customize your coffee and achieve a robust and full-bodied flavor, allowing you to enjoy coffee just the way you like it. Embrace the hands-on process, adjust the brewing variables to your preference, and savor the rich aroma and taste that a well-brewed cup of percolated coffee can offer.
Whether you choose a percolator for its nostalgic charm, its versatility on different heat sources, or the unique brewing experience it provides, remember that coffee is a personal pleasure. Each brewing method has its merits, and the best coffee experience is the one that brings joy and satisfaction to your daily cup. Happy percolating!
Read more:
Top 8 Best Dual Coffee Maker Reviews in 2024